Gata Luna - The Mast
 Old Spars Old SparsThe spars on my boat, being 30 years old, were in need of a facelift. When aluminum oxidizes, it forms a protective coat over the metal underneath but it certainly doesnt look pretty. I figured I would try painting my boom and if that went well, I would do the mast. It was fairly easy and the boom and mast now look new. Of course, I wanted to replace some of the hardware, etc. For more on painting see my section on paint. |
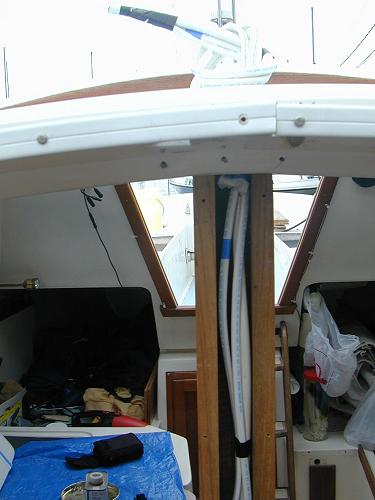 Mast Wiring Mast WiringOriginally, the wiring for the mast was embedded in the headliner and ran up into the mast through the mast step. A previous owner decided to run new wiring and drilled two holes from the liner in the head compartment at an angle into the mast step. They then ran the wire along the top of the headliner to the electric panel. Not only did this setup look crappy but it leaked water. In redoing things, I wanted to hide as much of the wiring as possible and ensure I had no leaks below the mast step. My solution was to drill a new hole through the cabin top into the hollow compression post. I then ran my wiring down the post and into the forward seat of the dinette. To seal the hole, I taped around the wires from below and injected epoxy into the hole for the wire. I have a photo of this here. The wires are now hidden and Im confident my setup will be watertight. |
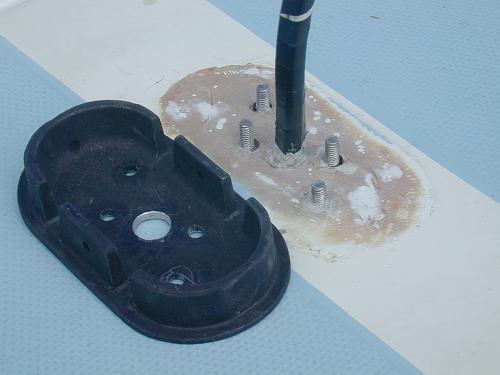 Mast Step Mast StepMy original mast step was a mess. While I was unstepping the mast it pulled right out of the cabin top. I eventually had to use a hacksaw and a chisel to get it off the bottom of the mast. In placing the new step on, I first filled all the holes from the old step and the holes the previous owner had drilled for the wires. Then, rather then use screws into the deck, I drilled holes and epoxied studs into them. Finally, I used bolts to screw the new mast step on and covered everything in polysulfide and silicone to keep the moisture out. |
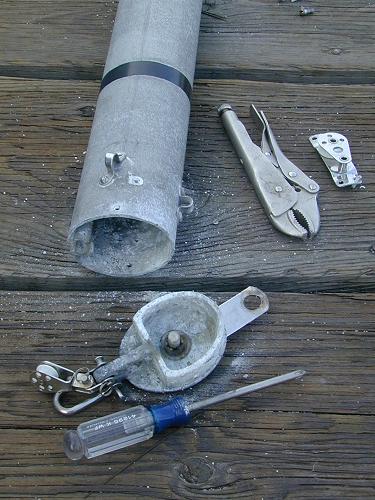
 Spreader Brackets Spreader BracketsA big reason for pulling the mast was to replace the original cast aluminum spreader brackets with stainless ones. These have been known to fail and you could lose your entire rig over the side. Removing the old brackets was quite a chore. The bottom bolt had corroded to its compression tube so I had to use a Dremel to cut both ends of the bolt off. When I put the new brackets on, I had to use a long piece of 1X2 board to hold the new compression tubes while I put the screws through. Since I couldnt get the spreader arms out of the old brackets, I replaced those too. Here you see a picture of the new arm and bracket compared to the orginal. I also replaced my crappy masthead light with a combo running light/foredeck light. |
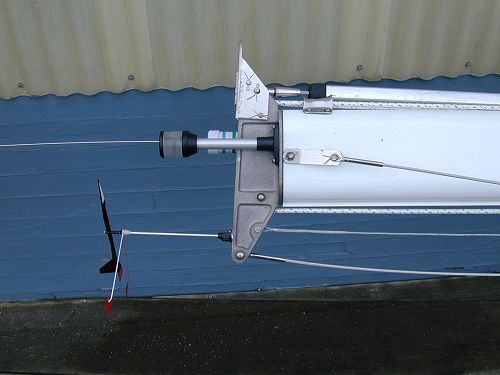 Masthead MastheadAnother reason for pulling the mast was to replace some equipment at the mast head. I added a new anchor light, a new whip-style antenna, and a mount for a Windex. I also added a spinnaker bail. Although I took off much of my other spinnaker hardware I plan to someday add a cruising spinnaker and now would be the best time to add the bail. Since I was replacing my wire/rope halyards with all-rope halyards I also replaced the sheaves. Finally, I had been having problems with halyard wrap while rolling up my head sail with the roller furler. I added a halyard restrainer to increase the angle of the halyard to the top of the sail - hopefully fixing the problem. |
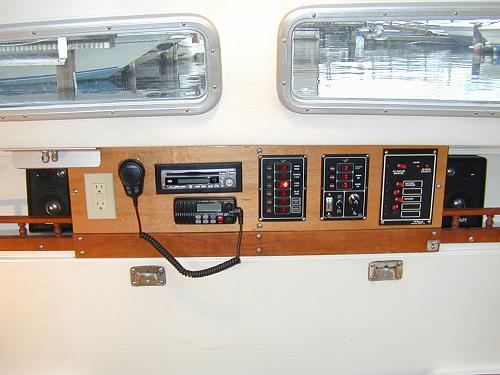 Electronics Panel Electronics PanelWith my new mast electronics and wiring I decided to do a bit of work on my electronics panel. The previous owner had installed a set of switches and a shore power setup in the panel above the dinette table. You can see a picture of the original setup here. I never liked this setup since the back was exposed to whatever was put in the left side of the panel (like an open beer). Also, I really wanted to move my VHF and stereo to this area as well, along with a cigarette lighter, inverter and battery meter. Also, I needed a few more switches. Eventually I came up with the idea of a wood panel that everything could be mounted into. I was able to use some of my leftover okome plywood and once I cut out all the openings, I varnished it like I did the bulkheads. Finally I added some small bookshelf speakers on either side of the panel for the stereo. I think it turned out pretty good. Note: the table is in the down position so that is why you don't see it. |
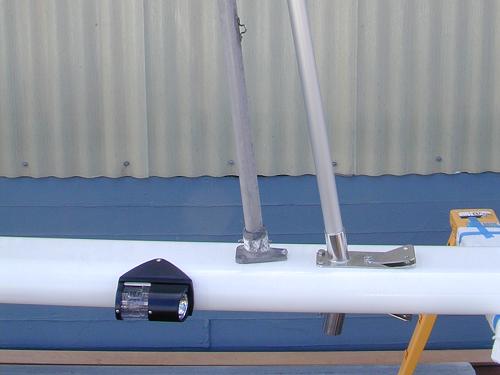
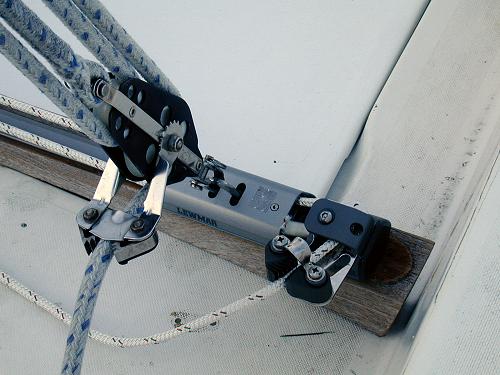 Traveller TravellerThe original travellers on this boat were pretty basic. When I upgraded my equipment, I added a new traveller from Lewmar. It comes as a kit with the track, car, and endstops. I upgraded the endstops to have integral cam cleats. This allows me to have a single continuous control line. The bolts slide into the track and are fitted for a metric hex head. I couldn't find bolts in this size that were long enough so I used normal screws and simply ground the edges so they would fit. Here is another photo of the track. |
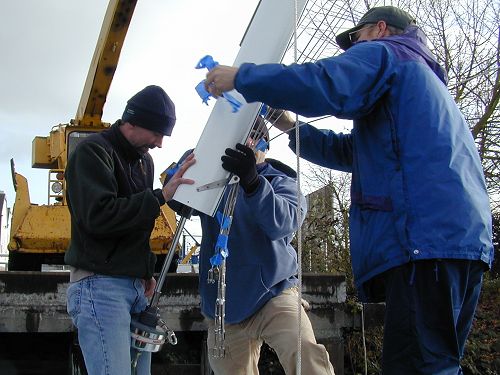 Stepping the Mast Stepping the MastAfter having the mast down for eight months, I was finally ready to put it back up. I attached the new standing rigging, installed the cotter pins, siezed the uppers to the spreader ends, put on the spreader boots, and finally taped everything to the mast to keep it from banging around. I enlisted the help of two friends and a professional rigger and motored to my local dockyard (Seaview East). The crane raised the mast into position and I plugged in my electrical and VHF cables. Then the crane gently lowered the mast onto the step. We ran around, attached shrouds, and got everything initially tightened in place. Finally, Kent, my rigger, got out his loos gauge and tightened the rigging to spec. Once I've sailed on it for a while, he will come back and do a final tune. |
Restoration
Copyright 2001
Scott & Karen Semyan